Note
Hello, welcome to the SunFounder Raspberry Pi & Arduino & ESP32 Enthusiasts Community on Facebook! Dive deeper into Raspberry Pi, Arduino, and ESP32 with fellow enthusiasts.
Why Join?
Expert Support: Solve post-sale issues and technical challenges with help from our community and team.
Learn & Share: Exchange tips and tutorials to enhance your skills.
Exclusive Previews: Get early access to new product announcements and sneak peeks.
Special Discounts: Enjoy exclusive discounts on our newest products.
Festive Promotions and Giveaways: Take part in giveaways and holiday promotions.
👉 Ready to explore and create with us? Click [here] and join today!
IO Expander
RGB LEDs
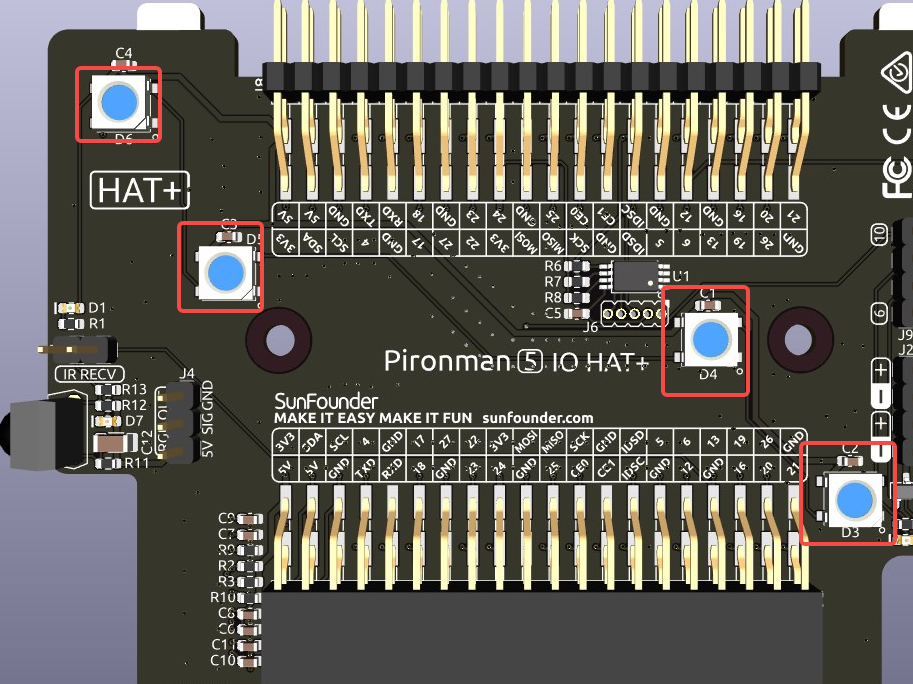
The board features 4 WS2812 RGB LEDs, offering customizable control. Users can turn them on or off, change the color, adjust the brightness, switch display modes, and set the speed of changes.
To modify the on and off state of the RGB LEDs,
trueto turn on the RGB LEDs,falseto turn them off.
pironman5 -re true
To change their color, input the desired hexadecimal color values, such as
fe1a1a.
pironman5 -rc fe1a1a
To change the brightness of the RGB LED (range: 0 ~ 100%):
pironman5 -rb 100
To switch RGB LED display modes, choose from options:
solid/breathing/flow/flow_reverse/rainbow/rainbow_reverse/hue_cycle:
Note
If you set the RGB LED display mode to rainbow, rainbow_reverse, or hue_cycle, you will not be able to set the color using pironman5 -rc.
pironman5 -rs breathing
To modify the speed of change (range: 0 ~ 100%):
pironman5 -rp 80
RGB Control Pin
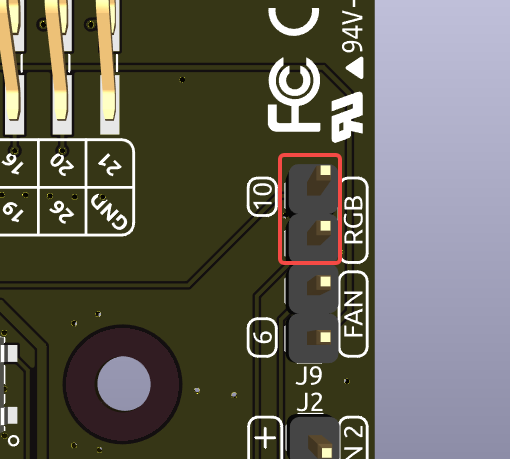
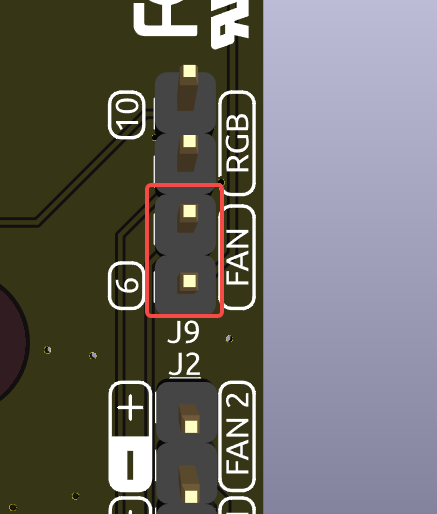
The RGB LEDs are driven by SPI and connected to GPIO10, which is also the SPI MOSI pin. The two pins above J9 are used to connect the RGB LEDs to GPIO10. If not needed, the jumper can be removed.
RGB OUT Pins
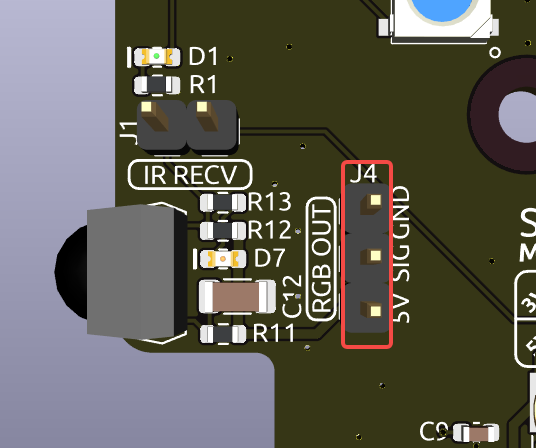
The WS2812 RGB LEDs support serial connection, allowing for the attachment of an external RGB LED strip. Connect the SIG pin to the external strip’s DIN pin for expansion.
The default setup includes 4 RGB LEDs. Connect additional LEDs and update the count using:
pironman5 -rl 12
OLED Screen Connector
The OLED screen connector, with an address of 0x3C, is a key feature.
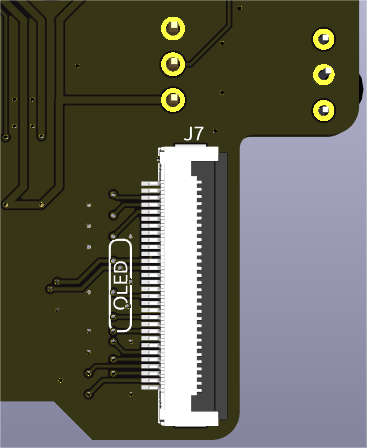
If the OLED Screen is not displaying or displaying incorrectly, you can follow these steps to troubleshoot the issue:
Check if the FPC cable of the OLED Screen is properly connected.
Use the following command to view the program’s run logs and check for error messages.
cat /opt/pironman5/logAlternatively, use the following command to check if the OLED’s i2c address 0x3C is recognized:
sudo i2cdetect -y 1
If the first two steps don’t reveal any issues, try restarting the pironman5 service to see if that resolves the problem.
sudo systemctl restart pironman5.service
Infrared Receiver
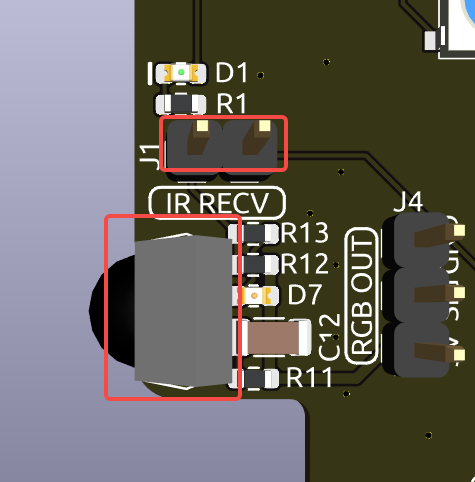
Model: IRM-56384, operating at 38KHz.
Connection: The IR receiver connects to GPIO13.
D1: An infrared reception indicator that blinks upon signal detection.
J8: A pin for enabling the infrared function. By default, a jumper cap is inserted for immediate functionality. Remove the cap to free GPIO13 if the IR receiver is not in use.
To utilize the IR receiver, verify its connection and install the necessary module:
Test the connection:
sudo ls /dev |grep lirc
Install the
lircmodule:sudo apt-get install lirc -y
Now, test the IR Receiver by running the following command.
mode2 -d /dev/lirc0
After running the command, press a button on the remote control, and the code of that button will be printed.
RGB Fan Pins
The IO expansion board supports up to two 5V non-PWM fans. Both fans are controlled together.
FAN1 and FAN 2 are two sets of fan pins. You need to connect the fan’s red wire to “+”, and the black wire to “-“.
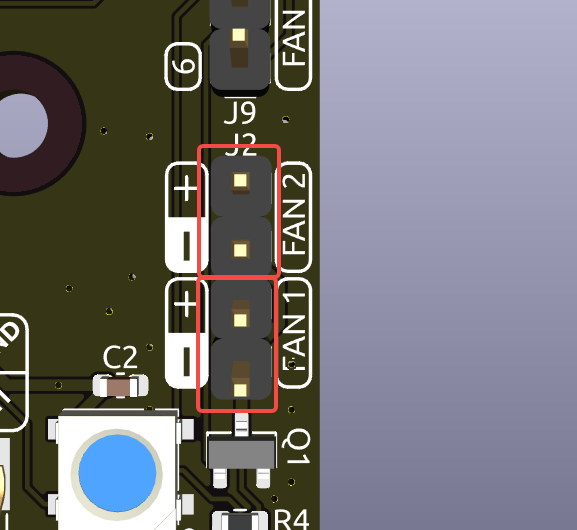
The two pins below J9 are the enable pins for RGB fans. By default, a jumper is inserted on these pins, allowing control of the fans’ on and off state using GPIO6. If fan operation is not desired, the jumper can be removed to free GPIO6.
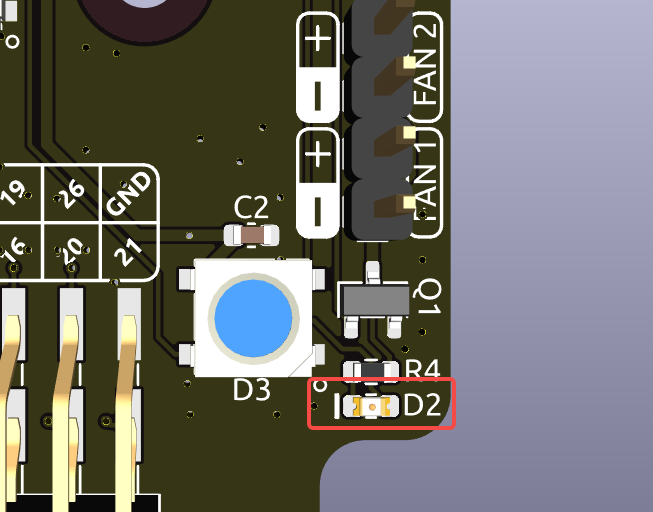
D2 is a fan signal indicator that lights up when the fan is active.
You can use command to configure the operating mode of the two RGB fans. These modes determine the conditions under which the RGB fans will activate.
For instance, if set to 1: Performance mode, the RGB fans will activate at 50°C.
pironman5 -gm 3
4: Quiet: The RGB fans will activate at 70°C.
3: Balanced: The RGB fans will activate at 67.5°C.
2: Cool: The RGB fans will activate at 60°C.
1: Performance: The RGB fans will activate at 50°C.
0: Always On: The RGB fans will always on.
If you connect the control pin of the RGB fan to different pins on the Raspberry Pi, you can use the following command to change the pin number.
sudo pironman5 -gp 18
Pin Headers
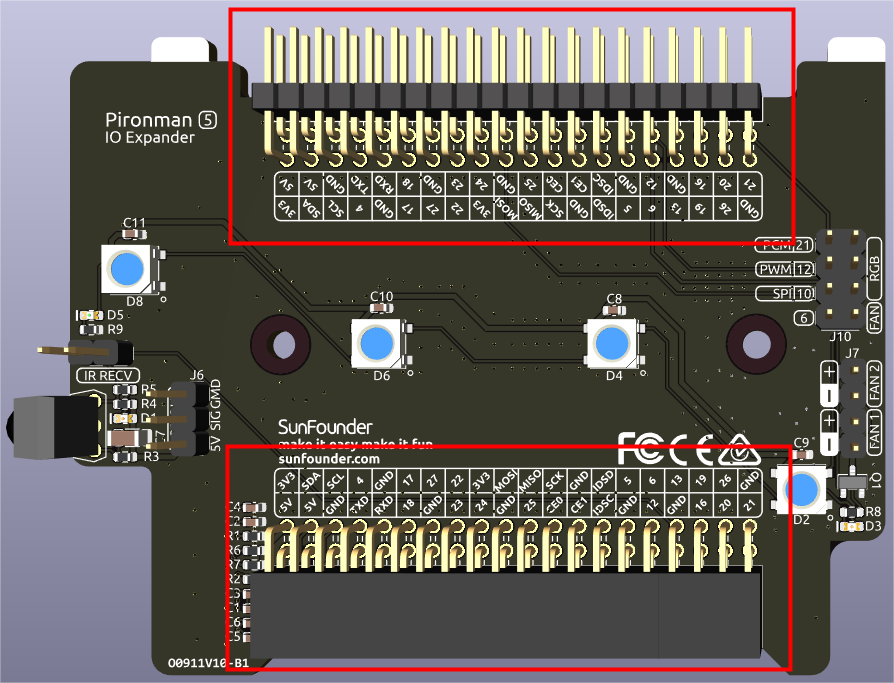
Two right-angle header connectors extend the Raspberry Pi’s GPIO, but note that the IR receiver, RGB LED, and fan occupy some pins. Remove the corresponding jumper caps to utilize these pins for other functions.
Pironman 5 |
Raspberry Pi 5 |
|---|---|
IR Receiver(Optional) |
GPIO13 |
OLED SDA |
SDA |
OLED SCL |
SCL |
FAN(Optional) |
GPIO6 |
RGB(Optional) |
GPIO10 |
RGB(Optional) |
GPIO12 |
RGB(Optional) |
GPIO21 |